The first time I tried Japanese cheesecake, I couldn’t believe how different it was from the New York–style cheesecake I grew up with.
Instead of being dense and heavy, it was soft, airy, and almost melted in my mouth. It reminded me of a cross between a cheesecake and a soufflé, and I instantly fell in love.
Making this at home might sound intimidating, but it’s more approachable than you think. With a few simple ingredients and some careful steps, you can create a cheesecake that’s tall, fluffy, and downright magical. This recipe is written for the U.S. kitchen, with clear instructions and everyday ingredients.
Ingredients You’ll Need
For one 8-inch cheesecake:
- 8 oz cream cheese, softened
- 4 tablespoons unsalted butter, softened
- ½ cup whole milk
- 6 large eggs, separated
- ¾ cup granulated sugar (divided)
- ½ cup cake flour (or substitute with all-purpose flour sifted with 1 tablespoon cornstarch)
- 2 tablespoons cornstarch
- ¼ teaspoon salt
- 1 teaspoon vanilla extract
- ¼ teaspoon cream of tartar (or lemon juice, helps stabilize the egg whites)
Optional for serving: powdered sugar, fresh strawberries, or whipped cream.
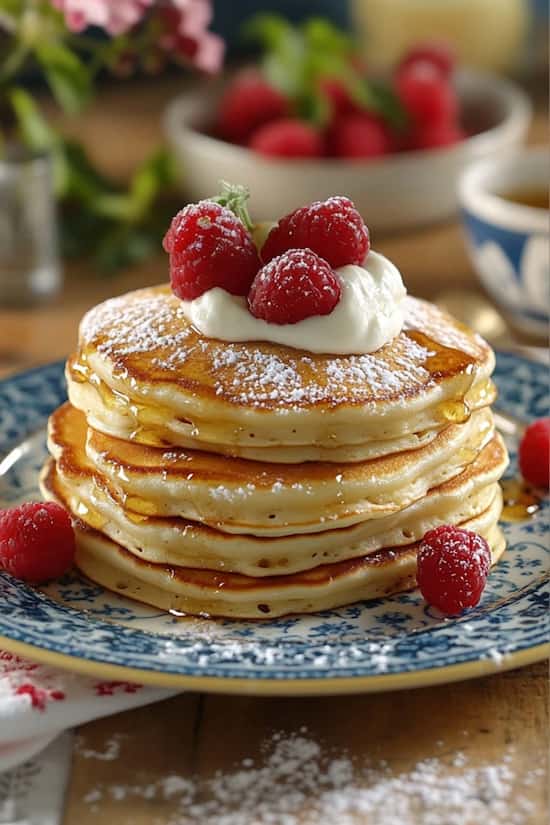
How To Make Japanese Pancakes
Preheat your oven to 325°F. Line the bottom of an 8-inch round cake pan with parchment paper, and grease the sides lightly.
Wrap the outside of the pan with foil — this helps with the water bath. Place the pan in a larger roasting pan that you’ll fill with hot water later.
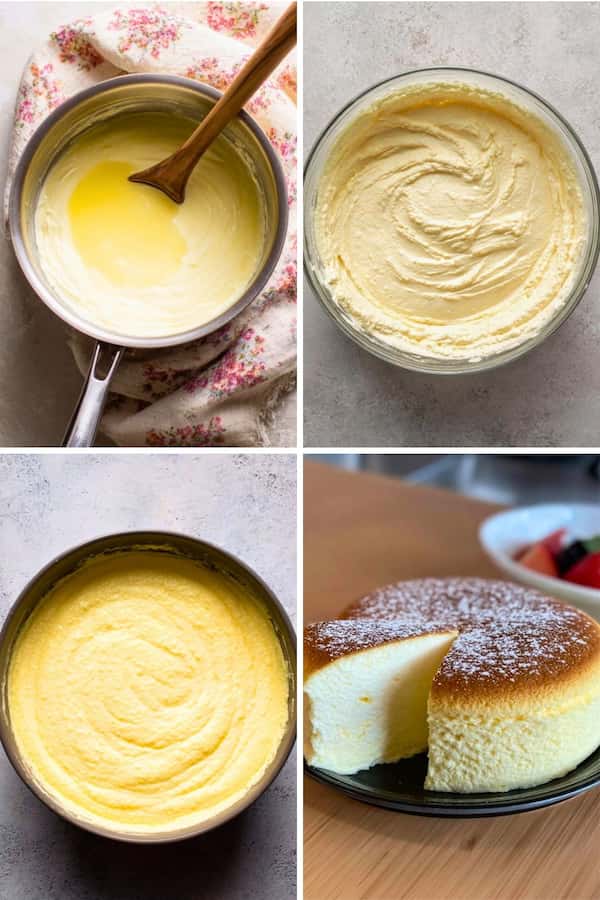
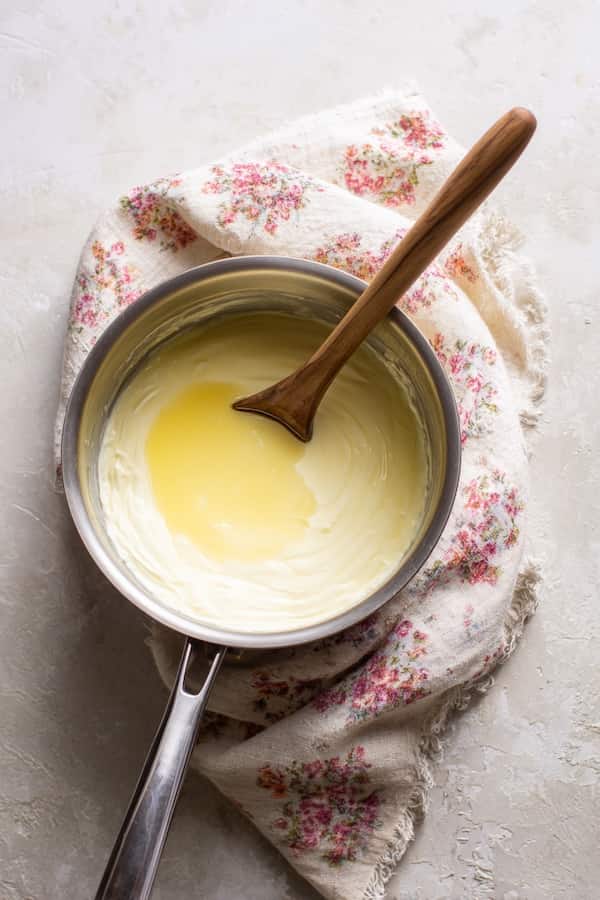
Make the Creamy Base
In a heatproof bowl set over a pot of simmering water (a double boiler), melt the cream cheese, butter, and milk together. Stir until smooth, then remove from the heat. Let it cool slightly before moving on.
Add Dry Ingredients
Whisk the egg yolks into the cream cheese mixture, one at a time, until smooth. Add the vanilla, salt, cake flour, and cornstarch, whisking gently until everything is incorporated. Set aside.
Whip the Egg Whites
In a clean mixing bowl, beat the egg whites with cream of tartar until foamy. Gradually add the sugar (about ½ cup total) and keep beating until stiff peaks form. This step is what gives the cheesecake its signature rise and fluffy texture.
Fold It Together
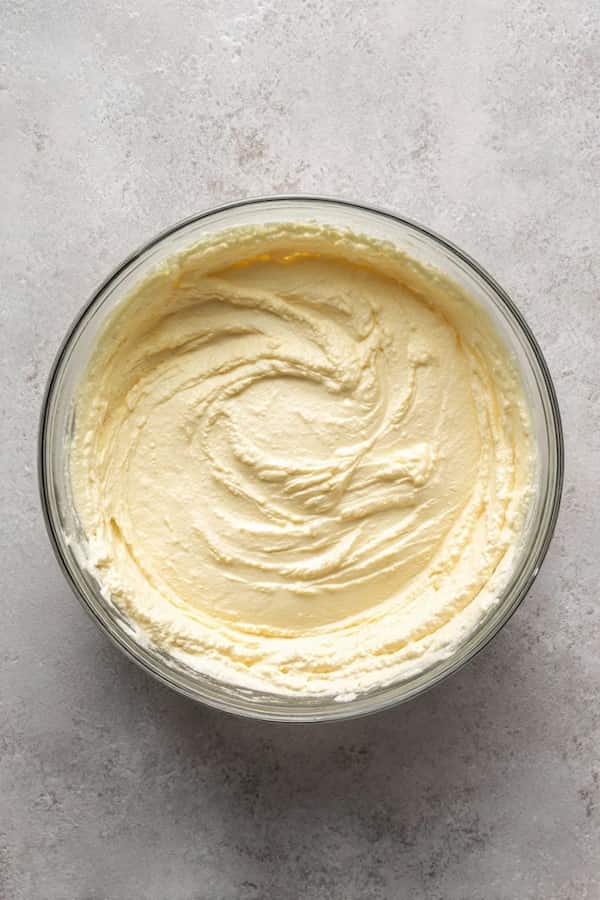
Take about one-third of the whipped egg whites and gently fold them into the cream cheese batter to lighten it. Then fold in the remaining egg whites carefully, making sure not to deflate them. The batter should be airy and smooth.
Bake in a Water Bath
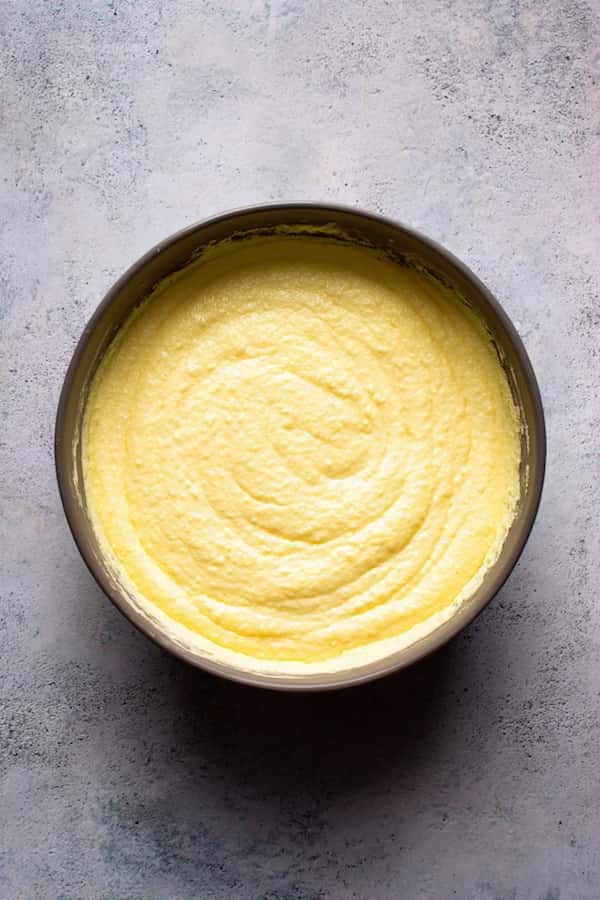
Pour the batter into your prepared cake pan. Place the roasting pan with the cake pan into the oven, and pour hot water into the roasting pan until it comes halfway up the sides of the cake pan.
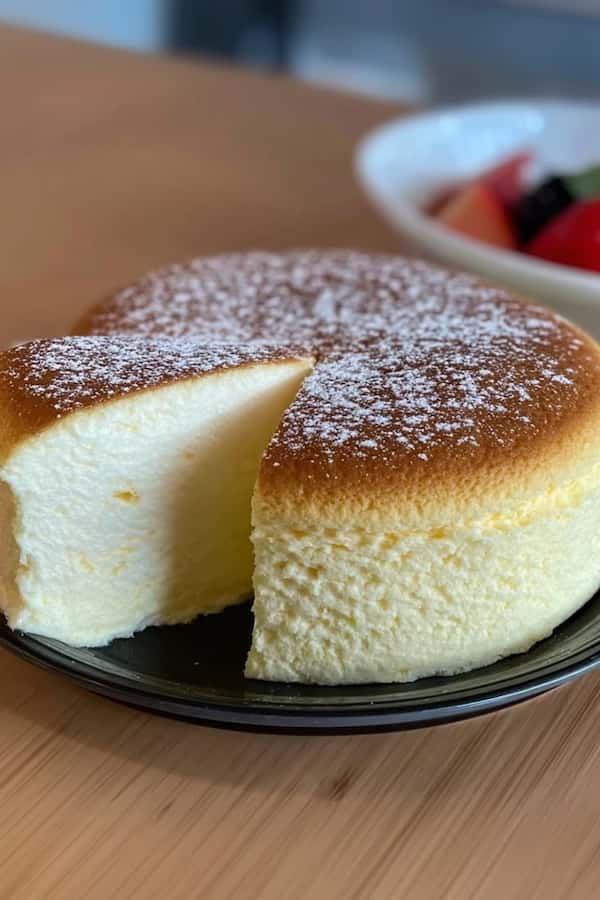
Bake for 60–70 minutes, until the top is golden brown and the cake is set but still slightly jiggly in the center.
Cool Gradually
Turn off the oven, crack the oven door open, and let the cheesecake sit inside for about 15 minutes. This prevents sudden temperature changes that can cause cracks. Then remove it from the oven, let it cool completely in the pan, and refrigerate for at least 2 hours before slicing.
Serve and Enjoy
Dust with powdered sugar, add fresh strawberries, or serve plain. The cheesecake should be light, fluffy, and cloud-like — perfect with tea or coffee.
Why You’ll Love This Recipe
Japanese cheesecake is different from the rich, dense cheesecakes we’re used to in the U.S. It’s lighter, softer, and feels almost like eating a sweet cloud.
The flavor is subtle, with just the right balance of tang from the cream cheese and sweetness from the sugar. It’s elegant enough for a dinner party but simple enough to make for yourself on a cozy weekend.
Make It Yours
One of the best things about Japanese cheesecake is how customizable it is. You can keep it plain and classic, or add flavors to suit your taste. A teaspoon of lemon zest in the batter gives it a refreshing brightness. Matcha powder adds an earthy, green-tea twist.
If you love chocolate, sift a tablespoon of cocoa powder into the flour.
For toppings, fresh berries are always a hit, but you could also drizzle honey or caramel sauce over each slice.
Tips for Success
Japanese cheesecake is all about technique, but once you get the hang of it, it’s straightforward. Bake it low and slow to avoid cracks, and don’t skip the water bath — it keeps the oven moist and the cake tender. Whipping the egg whites correctly is crucial, so aim for stiff peaks that hold their shape but aren’t dry. Finally, handle the batter gently when folding; you want to keep as much air in as possible.
How to Serve
This cheesecake is best served chilled. Slice it gently with a warm knife (dip it in hot water and wipe dry) to get those clean, neat cuts. Pair it with coffee, tea, or even a glass of champagne if you’re celebrating. It’s a dessert that feels light enough for summer but cozy enough for winter — truly an all-season treat.
Storage
Store leftovers in the refrigerator, covered, for up to 4 days. Japanese cheesecake also freezes well — just wrap slices tightly in plastic wrap and freeze for up to a month. Thaw in the fridge overnight before serving.
A Dessert That Feels Like a Cloud
Japanese cheesecake may look fancy, but at its heart, it’s a humble dessert made from eggs, sugar, and cream cheese. It’s proof that simple ingredients, when treated with care, can create something truly special.
Once you make it, you’ll understand why this cheesecake has such a devoted following. It’s light, dreamy, and absolutely unforgettable.
Ingredients
Method
- Line the bottom of an 8-inch round cake pan with parchment paper
- Wrap the outside of the pan with foil
- In a heatproof bowl set over a pot of simmering water
- Melt the cream cheese, butter, and milk together. Stir until smooth, then remove from the heat.
- Whisk the egg yolks into the cream cheese mixture
- Add the vanilla, salt, cake flour, and cornstarch
- In a clean mixing bowl, beat the egg whites with cream of tartar until foamy.
- Add the sugar (about ½ cup total) and keep beating until stiff peaks form.
- Take about one-third of the whipped egg whites and gently fold them into the cream cheese batter
- Then fold in the remaining egg whites
- Pour the batter into your prepared cake pan.
- Place the roasting pan with the cake pan into the oven, and pour hot water into the roasting pan until it comes halfway up the sides of the cake pan.
- Bake for 60–70 minutes
- Turn off the oven, crack the oven door open, and let the cheesecake sit inside for about 15 minutes
- Refrigerate for at least 2 hours before slicing.