There’s something incredibly comforting about a simple piece of vanilla fudge. Soft, creamy, and sweet in the gentlest way. This recipe brings back that classic old-fashioned flavor without any complicated steps.
Why I Love This Vanilla Fudge
Fudge is one of those nostalgic sweets that always reminds me of small shops, glass counters, and handwritten labels offering “just one piece.” It has a charm that never goes out of style. Vanilla fudge, especially, has a purity you don’t find in chocolate or caramel versions.
This recipe is my go-to when I want something homemade but not overwhelming. It uses simple pantry ingredients and turns them into a soft, melt-in-your-mouth treat that feels like it came from a little seaside candy shop. It’s creamy, smooth, and carries that warm vanilla aroma that fills your kitchen the moment you start cooking.
What Makes This Recipe Classic
Old-fashioned fudge has a very specific texture — firm enough to hold its shape but creamy enough to melt almost instantly on your tongue. It’s not chewy like caramel and not crumbly like tablet candy. Instead, it has a balanced softness that comes from controlling the heat, mixing patiently, and letting the sugar do its work.
You don’t need any special equipment beyond a pot, a spoon, and a baking pan. The secret is simply paying attention. When the mixture thickens and starts to pull away slightly from the sides, that’s when the magic begins.
Ingredients
Serves 16 Squares
Main Ingredients
- 3 cups granulated sugar
- ¾ cup unsalted butter
- ½ cup whole milk
- 1 tablespoon vanilla extract
- 1 cup marshmallow creme (or marshmallow fluff)
- Pinch of salt
Optional Add-Ins
- White chocolate chips
- Crushed nuts
- Sea salt flakes
- A splash of almond extract
Prepare the Pan
Before anything starts boiling, line an 8×8-inch pan with parchment paper. Leave enough overhang so you can lift the fudge out later.
This simple step saves you from chipping fudge from corners and gives beautifully clean slices.
Melt the Base
Add the butter, sugar, milk, and salt to a medium saucepan. Place the pot over medium heat and stir gently as the butter melts. Everything will slowly blend into a creamy, pale mixture. Keep stirring so none of the sugar sticks to the bottom.
Bring to a Gentle Boil
Once fully combined, increase the heat slightly until the mixture begins to bubble. Let it boil for 4–5 minutes, stirring often.
You’ll notice it thickening and becoming glossier. This is where the fudge texture starts to form.
If you’ve ever had fudge that turned grainy, it usually comes from undercooking or letting the sugar crystallize on the sides. Stirring helps prevent that — but don’t stir aggressively. Smooth, steady movements are perfect.
Add the Marshmallow Creme
Remove the pot from the heat and quickly stir in the marshmallow creme. This addition is what gives homemade fudge that velvety texture without needing a candy thermometer. It dissolves into the mixture instantly, making everything smooth and rich.
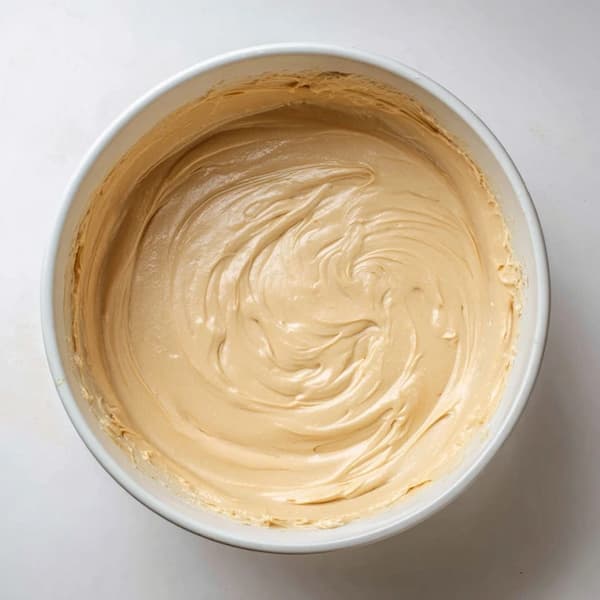
Add the Vanilla
Stir in the vanilla extract. Don’t rush this moment — the aroma is incredible, and mixing it slowly helps the flavor spread evenly.
You’ll see the mixture turn slightly creamy in color and develop that classic vanilla shine.
Pour and Smooth
Pour the fudge mixture into your prepared pan. Use a spatula to spread the top evenly. If you’re adding toppings like chopped nuts or sea salt, sprinkle them while the fudge is still warm so they stick.
Let It Set
Let the fudge sit at room temperature for 2–3 hours. If you want to speed it up, chill it in the refrigerator for 45–60 minutes. Once firm, lift it out using the parchment paper and slice into neat squares.
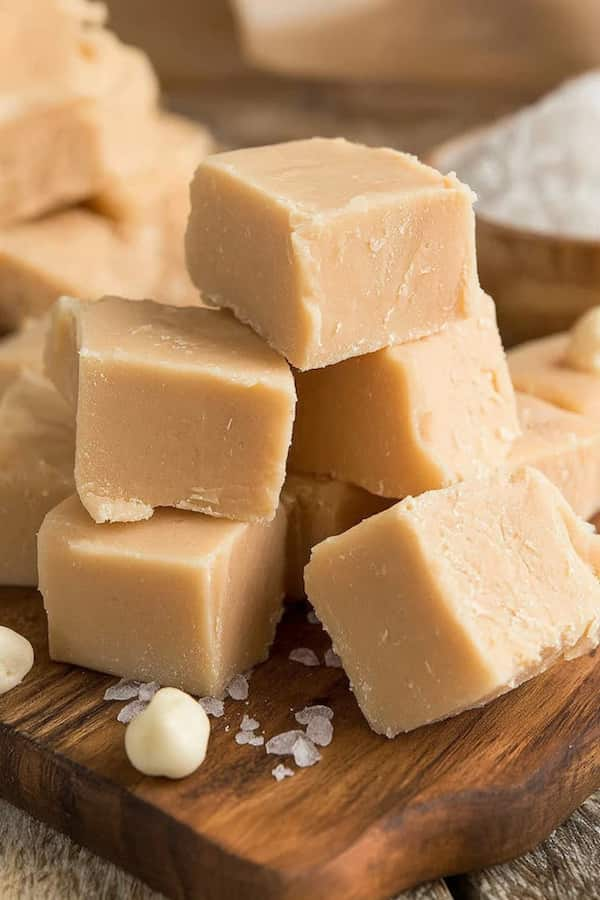
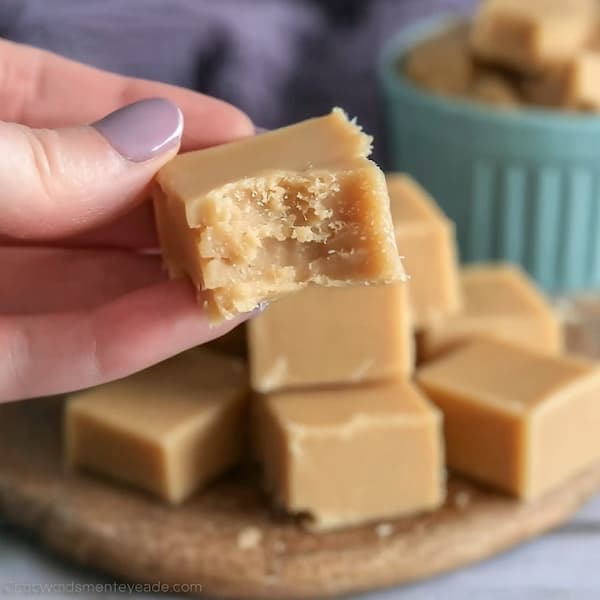
How It Should Look and Feel
Perfect vanilla fudge has a soft but stable texture. When you press it lightly with your finger, it should give a little — not too firm, not too mushy.
When you bite into it, it should melt slowly, leaving a smooth, buttery sweetness with just the right amount of vanilla.
Small Tips That Make a Big Difference
Don’t Skip the Boiling Time – Those 4–5 minutes of boiling are what help the fudge set. Less time = softer fudge. More time = firmer fudge.
Add Vanilla Off the Heat – Boiling vanilla can dull its flavor. Adding it at the end keeps the taste warm and clean.
Line the Pan Well – Fudge sticks to everything. Parchment makes slicing and lifting effortless.
Use Real Butter – Margarine changes the texture and flavor. Real butter gives the fudge that rich, classic flavor.
Stir Consistently – Not fast — just steady. This prevents sugar crystals from forming.
How to Store Your Vanilla Fudge
This fudge keeps beautifully for one week at room temperature if stored in an airtight container.
If you refrigerate it, it will stay fresh for up to two weeks, though it may firm up slightly. For the best texture, let chilled pieces sit at room temperature for a few minutes before eating.
You can even freeze fudge. Just wrap it tightly and store for up to two months. Thaw in the fridge overnight and enjoy as usual.
When to Serve This Fudge
Vanilla fudge is the kind of treat that fits every season. You can pack it into holiday boxes, bring it to parties, or share it as a simple everyday sweet. It looks lovely on dessert tables and pairs beautifully with coffee, tea, and anything warm.
It’s also perfect for gifting. Wrap a few squares in parchment, tie with a ribbon, and you’ve got a thoughtful handmade present in minutes.
Can I Add Other Flavors to This Vanilla Fudge?
Absolutely. Vanilla fudge is a base that works with endless variations — almond extract, maple, caramel swirls, chopped nuts, or even crushed cookies. Start with small amounts so the vanilla still shines.
Why Did My Fudge Turn Grainy?
Grainy fudge usually happens when sugar crystallizes during cooking. Make sure to stir gently, boil long enough, and avoid scraping sugar crystals from the sides of the pot into the mixture.
Ingredients
Method
- Add the butter, sugar, milk, and salt to a medium saucepan. Place the pot over medium heat and stir gently as the butter melts. Keep stirring so none of the sugar sticks to the bottom.
- Once fully combined, increase the heat slightly until the mixture begins to bubble. Let it boil for 4–5 minutes, stirring often.
- If you’ve ever had fudge that turned grainy, it usually comes from undercooking or letting the sugar crystallize on the sides. Stirring helps prevent that — but don’t stir aggressively.
- Remove the pot from the heat and quickly stir in the marshmallow creme.
- Stir in the vanilla extract. Don’t rush this moment — the aroma is incredible, and mixing it slowly helps the flavor spread evenly.
- Pour the fudge mixture into your prepared pan.
- Use a spatula to spread the top evenly. If you’re adding toppings like chopped nuts or sea salt, sprinkle them while the fudge is still warm so they stick.
- Let the fudge sit at room temperature for 2–3 hours. If you want to speed it up, chill it in the refrigerator for 45–60 minutes.
- Perfect vanilla fudge has a soft but stable texture. When you press it lightly with your finger, it should give a little — not too firm, not too mushy.