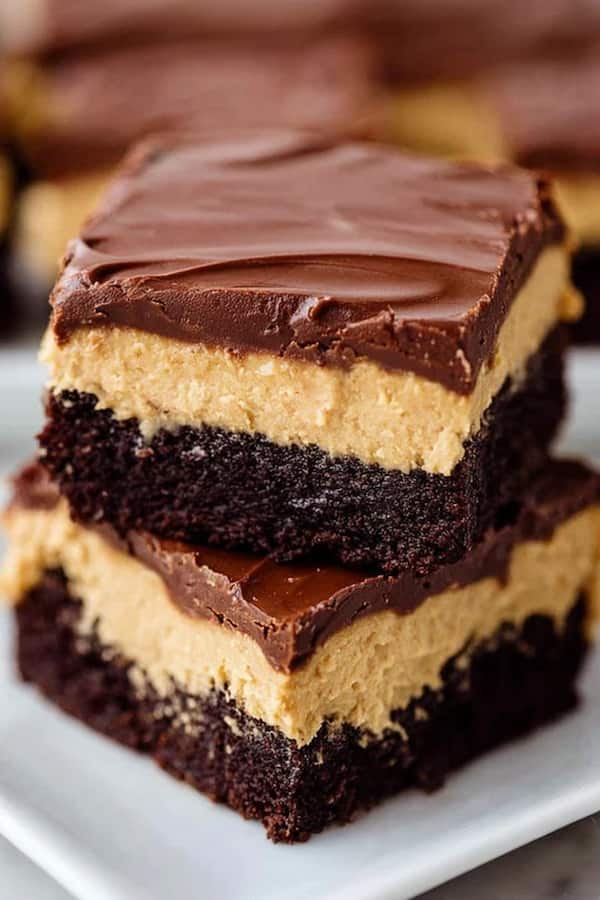
If you’ve ever loved the classic peanut butter buckeye candies, imagine them baked right into a thick, fudgy brownie — that’s exactly what this recipe delivers. Rich, chocolatey layers meet creamy peanut butter in one irresistible dessert.
These Buckeye Brownies are indulgent, comforting, and surprisingly simple to make. Perfect for holidays, potlucks, or anytime you want to impress without spending all day in the kitchen.
How This Recipe Happened
I’ve always been obsessed with the chocolate–peanut butter combo. One day, after making a batch of buckeye balls for a party, I had leftover peanut butter filling and decided to spread it over brownies.
The result was magic — a gooey, fudge-like base topped with a creamy peanut butter layer and a silky chocolate glaze. It instantly became one of my most requested desserts.
This recipe is my go-to when I want something that tastes like a bakery treat but takes less than an hour to prepare.
Ingredients (Serves 12 Brownies)
For the brownie layer:
- ½ cup unsalted butter (melted)
- 1 cup sugar
- 2 large eggs
- 1 teaspoon vanilla extract
- ⅓ cup cocoa powde
- ½ cup all-purpose flour
- ¼ teaspoon salt
- ¼ teaspoon baking powder
For the peanut butter layer:
- ½ cup creamy peanut butter
- 3 tablespoons unsalted butter, softened
- 1 cup powdered sugar
- 1 teaspoon vanilla extract
- 1 tablespoon milk (add more if needed for spreading)
For the chocolate topping:
- 1 cup semisweet chocolate chips
- 2 tablespoons creamy peanut butter
Make the Brownie Base
Preheat your oven to 350°F (175°C) and line an 8×8-inch baking pan with parchment paper. Leave a little overhang on the sides so you can lift the brownies out later.
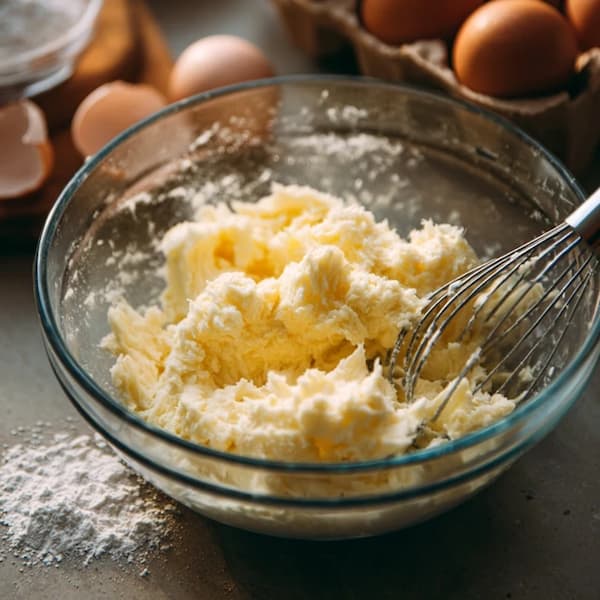
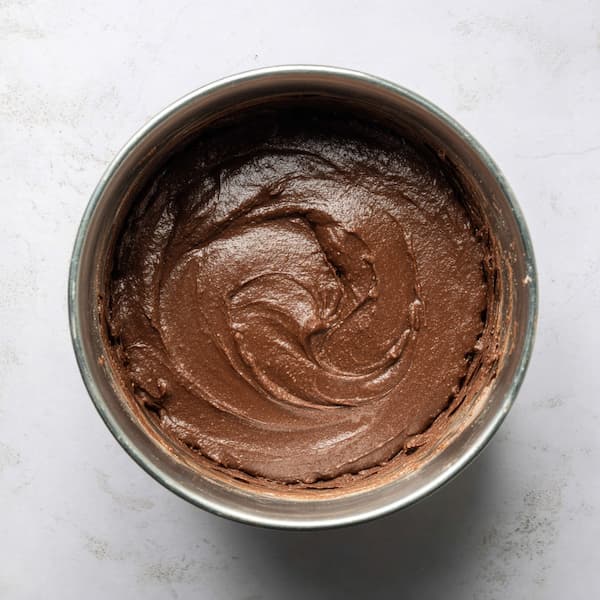
In a medium bowl, whisk together the melted butter and sugar until smooth. Add the eggs and vanilla and mix until shiny and thick.
Stir in the cocoa powder, flour, salt, and baking powder. Mix just until everything is combined — don’t overmix, or the brownies can turn cakey instead of fudgy.
Pour the batter into the prepared pan and smooth the top. Bake for 20–22 minutes, or until a toothpick inserted in the center comes out with a few moist crumbs. Let them cool completely before moving to the next layer.
Prepare the Peanut Butter Layer
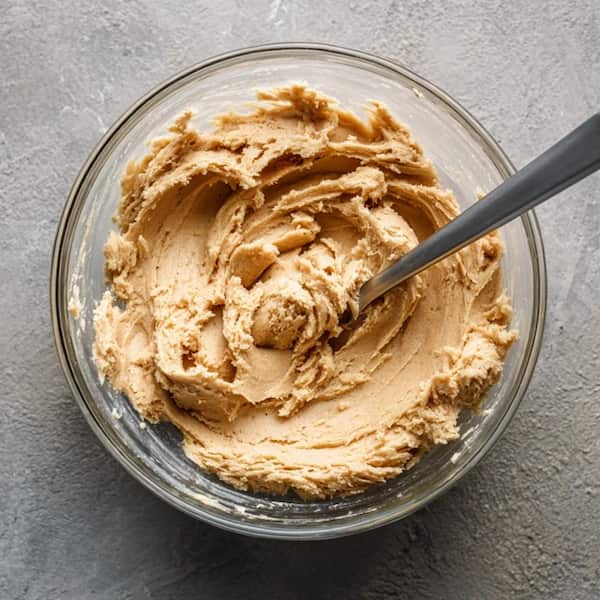
While the brownies cool, beat together peanut butter, softened butter, powdered sugar, vanilla, and milk in a mixing bowl until smooth and spreadable. The texture should be thick but not stiff. If it feels too dense, add a few more drops of milk.
Spread the peanut butter mixture evenly over the cooled brownie base using a spatula. Try to get it as smooth as possible — this will make your chocolate layer look clean and glossy later.
Place the pan in the fridge for about 15 minutes while you prepare the chocolate topping.
Add the Chocolate Layer
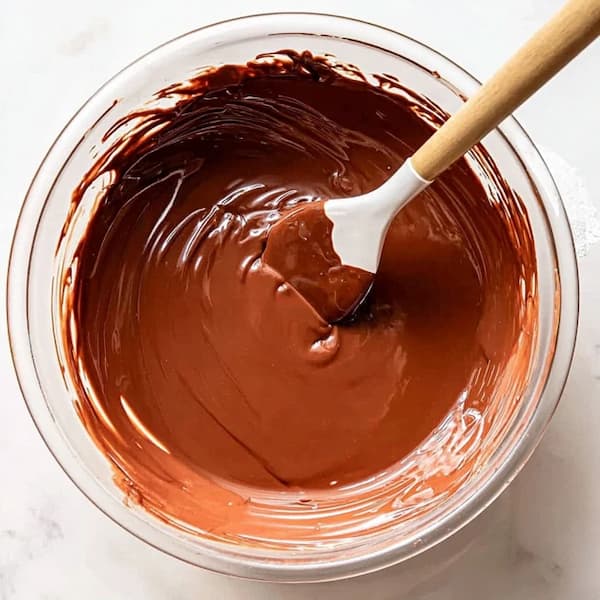
In a small microwave-safe bowl, combine chocolate chips and peanut butter. Heat in 20-second intervals, stirring after each, until melted and silky smooth.
Pour the chocolate mixture over the chilled peanut butter layer and tilt the pan gently to spread it evenly. You can also use a spatula for an even finish.
Refrigerate again for 30–40 minutes, until the top is firm enough to cut cleanly.
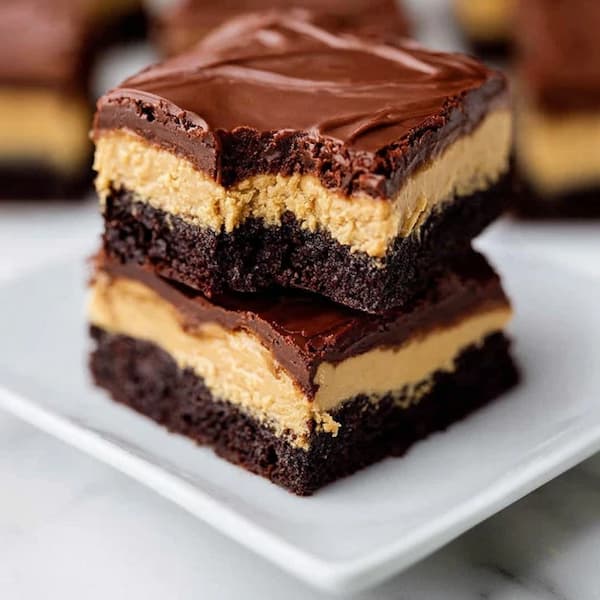
Slice and Serve
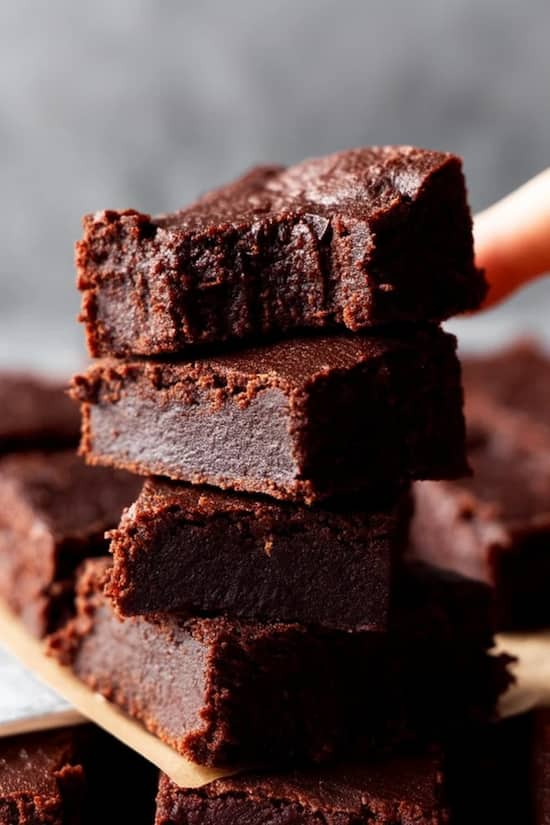
Once set, lift the brownies out of the pan using the parchment paper and place them on a cutting board. Use a sharp knife (warmed slightly under hot water and wiped dry) to slice into neat squares.
Each bite has the perfect balance — the chewy brownie base, the creamy peanut butter middle, and that soft chocolate topping. It’s pure dessert harmony.
My Tips for Perfect Buckeye Brownies
- Don’t rush the cooling: The peanut butter layer won’t spread well over warm brownies. Let them cool completely.
- Use creamy peanut butter: Natural peanut butters tend to separate and can make the filling grainy.
- Chill before slicing: This helps create those perfect, clean layers that make these brownies look professional.
- Add a pinch of sea salt: Sprinkle a few flakes on top before chilling for a sweet-salty twist.
Storage Tips
Keep the brownies covered in the refrigerator for up to 5 days. They taste amazing cold — almost like candy bars. If you prefer them softer, let them sit at room temperature for about 10 minutes before serving.
For longer storage, freeze them in an airtight container for up to 2 months. Place parchment paper between layers so they don’t stick together.
Why You’ll Love These
What makes these brownies so special is how they bring two favorites together — brownies and buckeye candies — in one dessert. They’re easy enough for beginners but elegant enough for a special occasion.
I often make them for birthdays or holiday dessert platters. Every time, someone asks for the recipe. And honestly, it’s one of those recipes that feels like a little secret — too simple for how incredible it tastes.
Related Questions
1. Can I Use a Boxed Brownie Mix Instead?
Yes! If you’re in a hurry, use your favorite boxed brownie mix and prepare it as directed. Let it cool completely, then continue with the peanut butter and chocolate layers as written. It’s a great shortcut and still tastes amazing.
2. Can I Make These Without Peanut Butter?
You can replace the peanut butter layer with almond butter, cashew butter, or even cookie butter for a different flavor. The texture stays the same, and it gives the brownies a fun twist.
My Verdict
Buckeye Brownies are one of those desserts that make you feel like a professional baker with minimal effort. Every layer is simple, but when they come together, it’s pure dessert magic. The fudgy brownie base and creamy peanut butter topping create a combination that’s impossible to resist.
Make them once, and you’ll have a new go-to dessert for parties, holidays, or just when you need something sweet and satisfying. These are more than just brownies — they’re a bite of nostalgia, comfort, and joy all in one pan.
Ingredients
Method
- In a medium bowl, whisk together the melted butter and sugar until smooth. Add the eggs and vanilla and mix until shiny and thick.
- Stir in the cocoa powder, flour, salt, and baking powder.
- Pour the batter into the prepared pan and smooth the top. Bake for 20–22 minutes. Let them cool completely before moving to the next layer.
- While the brownies cool, beat together peanut butter, softened butter, powdered sugar, vanilla, and milk in a mixing bowl until smooth
- Spread the peanut butter mixture evenly over the cooled brownie base using a spatula.
- Place the pan in the fridge for about 15 minutes while you prepare the chocolate topping.
- In a small microwave-safe bowl, combine chocolate chips and peanut butter. Heat in 20-second intervals, stirring after each, until melted
- Pour the chocolate mixture over the chilled peanut butter layer and tilt the pan gently to spread it evenly.
- Refrigerate again for 30–40 minutes
Notes
- Don’t rush the cooling: The peanut butter layer won’t spread well over warm brownies. Let them cool completely.
- Use creamy peanut butter: Natural peanut butters tend to separate and can make the filling grainy.
- Chill before slicing: This helps create those perfect, clean layers that make these brownies look professional.
- Add a pinch of sea salt: Sprinkle a few flakes on top before chilling for a sweet-salty twist.