There’s something deeply nostalgic about homemade chocolate fudge — the smooth texture, the rich chocolate flavor, and that perfect melt-in-your-mouth bite.
It’s a treat that feels like a warm hug, whether you make it for the holidays, a birthday, or just a cozy weekend at home. This recipe keeps it simple but still delivers that creamy, luxurious fudge you’d expect from a candy shop.
You don’t need fancy equipment or candy thermometers — just a few good ingredients, a saucepan, and a little patience. Once you make this fudge from scratch, you’ll never buy store-bought again.
My Story Behind This Fudge
The first time I made fudge, I was convinced it would be complicated — all those stories about sugar crystals and exact temperatures scared me off. But one winter, I decided to try a shortcut version using condensed milk, and it completely changed how I saw fudge. It was rich, smooth, and honestly foolproof.
Now I make it several times a year — sometimes plain, sometimes with nuts or sea salt. It’s become my go-to edible gift, and every batch turns out perfect. This recipe is that same one I’ve refined over time — easy enough for beginners, but indulgent enough to make you proud.
Ingredients (Makes About 16 Squares)
- 2 ½ cups semisweet or dark chocolate chips
- 1 (14 oz) can sweetened condensed milk
- 4 tablespoons unsalted butter (plus extra for greasing the pan)
- 1 teaspoon vanilla extract
- Pinch of salt
Optional additions:
- ½ cup chopped walnuts or pecans
- Flaky sea salt for topping
- ½ teaspoon instant espresso powder (enhances the chocolate flavor)
Prepare Your Pan
Line an 8×8-inch baking dish with parchment paper, leaving a bit hanging over the sides so you can lift the fudge out easily later. Lightly butter the paper to prevent sticking.
This little step makes slicing clean and simple — no need to fight with sticky corners later.
Melt the Chocolate and Butter
In a medium saucepan, combine the chocolate chips, sweetened condensed milk, and butter. Place it over low heat and stir continuously with a silicone spatula or wooden spoon.
As the mixture melts, you’ll see it turning glossy and thick. Keep stirring gently so the chocolate doesn’t burn. It should take about 5–6 minutes for everything to melt completely and become smooth.
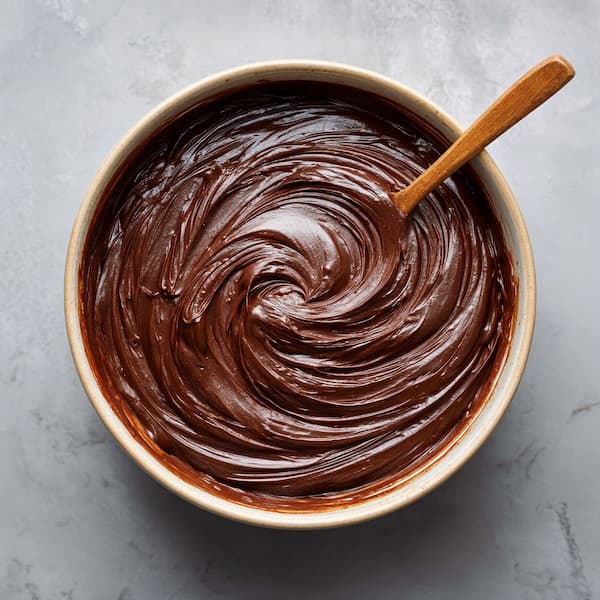
If you’re using espresso powder, add it here — it intensifies the chocolate without making the fudge taste like coffee.
Add the Vanilla and Salt
Once the chocolate mixture is completely melted, remove it from the heat. Stir in the vanilla extract and a pinch of salt. The vanilla brightens the flavor while the salt balances the sweetness.
If you’re adding nuts or other mix-ins, fold them in now. Make sure everything is evenly distributed.
Pour and Smooth
Pour the mixture into your prepared pan and use a spatula to spread it evenly. Tap the pan lightly on the counter to remove any air bubbles.
If you’re topping it with sea salt, sprinkle it now — just a few flakes go a long way in adding texture and contrast.
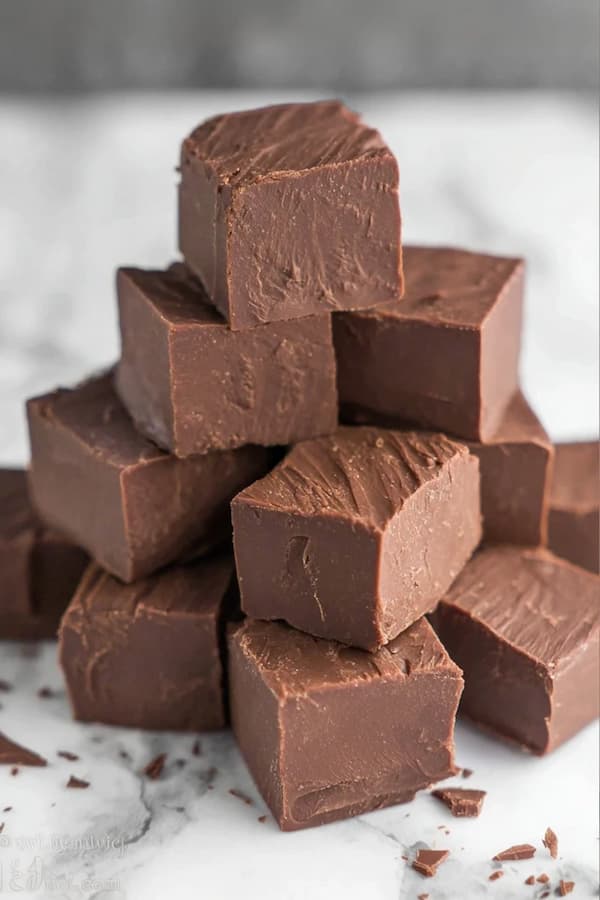
Chill and Set
Refrigerate the fudge for 2–3 hours, or until firm. Don’t rush this step — the slow cooling is what gives fudge its creamy texture.
Once set, lift the fudge out using the parchment paper and place it on a cutting board. Use a sharp knife to slice into small squares.
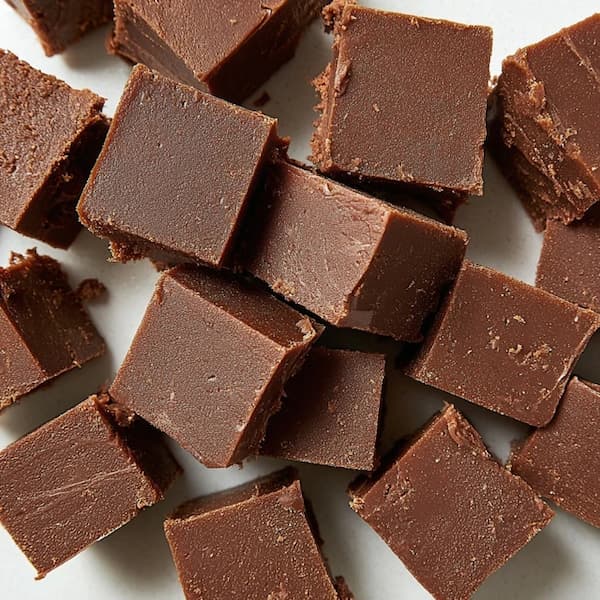
If your knife sticks, run it under warm water and wipe it dry before each cut. That helps you get clean, neat edges.
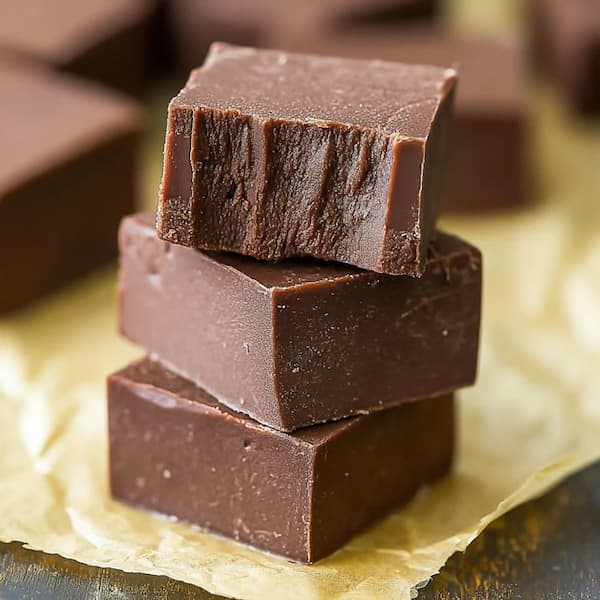
Serve and Enjoy
This fudge is rich, smooth, and perfectly sweet — a little goes a long way. Serve it as a dessert bite, wrap it as a gift, or keep a few pieces in the fridge for when your sweet tooth hits.
It’s also great as part of a holiday dessert platter with cookies and truffles.
My Personal Tips
- Use good chocolate: Since chocolate is the main flavor, choose a brand you actually enjoy eating. It makes a huge difference.
- Avoid high heat: Melting slowly is key. If you rush it, the chocolate can seize or turn grainy.
- Don’t skip the salt: Even a pinch makes the chocolate flavor pop.
- Play with toppings: Try drizzling melted white chocolate, sprinkling crushed nuts, or adding mini marshmallows for a twist.
Flavor Variations
Once you’ve mastered the base, you can create endless variations:
- Peanut Butter Swirl: Drop spoonfuls of warmed peanut butter on top before chilling, then swirl gently with a knife.
- Mint Chocolate: Add ½ teaspoon peppermint extract and top with crushed candy canes for a holiday touch.
- Rocky Road: Fold in mini marshmallows and chopped almonds before pouring into the pan.
- Coconut Dream: Mix in shredded coconut and top with toasted flakes.
Storage Tips
Store the fudge in an airtight container in the refrigerator for up to 2 weeks. For the best texture, bring it to room temperature before serving — it softens beautifully.
You can also freeze it. Wrap each piece in parchment or wax paper, place in a freezer-safe container, and freeze for up to 3 months. When ready to enjoy, thaw in the fridge overnight.
Why This Recipe Always Works
Many fudge recipes can be temperamental, but this one’s a keeper because it skips the candy thermometer and relies on simple, controlled heat. The sweetened condensed milk does the hard work — it gives the fudge structure and that smooth, glossy finish without risk of crystallization.
It’s simple enough to make with kids, quick enough for last-minute guests, and impressive enough for a holiday dessert table.
Every bite is creamy, chocolatey, and rich — exactly how real fudge should taste.
Tools You’ll Need
- Medium saucepan
- Spatula or wooden spoon
- Parchment paper
- 8×8-inch baking pan
- Sharp knife for slicing
Related Questions
1. Can I Make Fudge in the Microwave?
Yes, you can! Combine all ingredients (except vanilla and salt) in a microwave-safe bowl. Heat in 20-second intervals, stirring after each, until smooth. Stir in vanilla and salt at the end. It’s the fastest way to make fudge when you’re short on time.
2. Can I Use White Chocolate Instead of Regular Chocolate?
Absolutely. Use the same amount of white chocolate chips and add 1 extra tablespoon of butter to keep it creamy. You can also mix in dried cranberries or pistachios for a festive version.
A Must-Try Treat For The Holidays!
Chocolate fudge is one of those timeless desserts that never goes out of style. It’s rich without being heavy, indulgent yet simple, and it always makes people smile.
This version is smooth, creamy, and foolproof — no fancy tools, no tricky timing, just pure chocolate bliss. Once you taste it, you’ll understand why homemade fudge is so special. Keep a few squares in the fridge for yourself… because it’s impossible to make this and not sneak a bite.
Ingredients
Method
- Line an 8×8-inch baking dish with parchment paper
- In a medium saucepan, combine the chocolate chips, sweetened condensed milk, and butter.
- Place it over low heat and stir continuously with a silicone spatula or wooden spoon.
- It should take about 5–6 minutes for everything to melt completely
- Once the chocolate mixture is completely melted, remove it from the heat. Stir in the vanilla extract and a pinch of salt.
- If you’re adding nuts or other mix-ins, fold them in now
- Pour the mixture into your prepared pan and use a spatula to spread it evenly.
- Tap the pan lightly on the counter to remove any air bubbles.
- Refrigerate the fudge for 2–3 hours, or until firm. Don’t rush this step — the slow cooling is what gives fudge its creamy texture.
- Once set, lift the fudge out using the parchment paper and place it on a cutting board. Use a sharp knife to slice into small squares.
Notes
- Peanut Butter Swirl: Drop spoonfuls of warmed peanut butter on top before chilling, then swirl gently with a knife.
- Mint Chocolate: Add ½ teaspoon peppermint extract and top with crushed candy canes for a holiday touch.
- Rocky Road: Fold in mini marshmallows and chopped almonds before pouring into the pan.
- Coconut Dream: Mix in shredded coconut and top with toasted flakes.