Making your own strawberry jam is like catching a bit of summer and putting it in a jar. Most people think you need a chemistry degree and a kitchen full of special tools to make jam, but that is not the case at all.
With just three simple ingredients and a little bit of time at the stove, you can create a spread that makes store-bought versions taste like colored corn syrup.
Ingredients
This recipe makes about 4 half-pint jars, which is roughly 64 servings if you use a tablespoon per piece of toast.
- 2 pounds fresh strawberries (hulled and sliced)
- 4 cups granulated white sugar
- 1/4 cup fresh lemon juice
- 1 small knob of butter (optional, to reduce foam)
Simple Logic
The best jam is not complicated. It relies on the natural pectin found in the fruit to create a thick, spreadable texture. Strawberries are actually a bit low in pectin, which is why we add lemon juice. The acid in the lemon works with the sugar to help the fruit set into a gel. Without the lemon, you would just have a very delicious strawberry soup.
I love this recipe because it does not use store-bought pectin powder. While powder is fine, it can sometimes give jam a rubbery texture. By using the old-school method of boiling the fruit and sugar together, you get a much softer, more natural set. The flavor of the berries stays bright, and the color remains a deep, beautiful red.
Prep Fruit
Start by washing your berries in cold water. Remove the green tops and slice the berries into halves or quarters. If you like a very smooth jam, you can mash them with a potato masher in a large bowl.
If you like big chunks of fruit in your jam, leave them as they are. Put the berries in a heavy-bottomed pot. A wide pot is better than a tall one because it allows the moisture to evaporate faster.
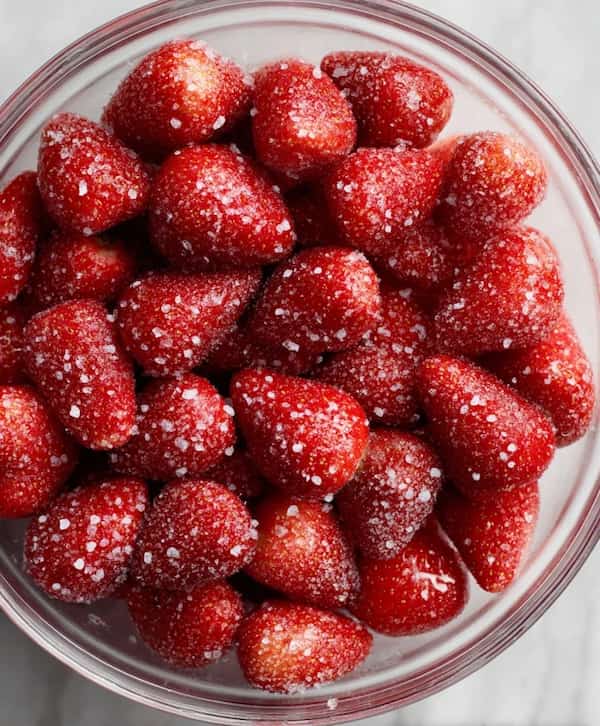
Sugar Soak
Pour the sugar over the berries and stir them together. Let this sit for about thirty minutes. This is called macerating. The sugar will draw the juice out of the strawberries, creating a thick syrup before you even turn on the stove.
This helps the fruit keep its shape and ensures the sugar is fully dissolved so your jam does not turn out gritty.
First Boil
Add the lemon juice and turn the heat to medium. Stir the pot constantly until the sugar is completely melted.
Once the liquid is clear and bubbling, turn the heat up to medium-high. You want to bring the mix to a full, rolling boil. This is a boil that does not stop even when you stir it with a spoon.
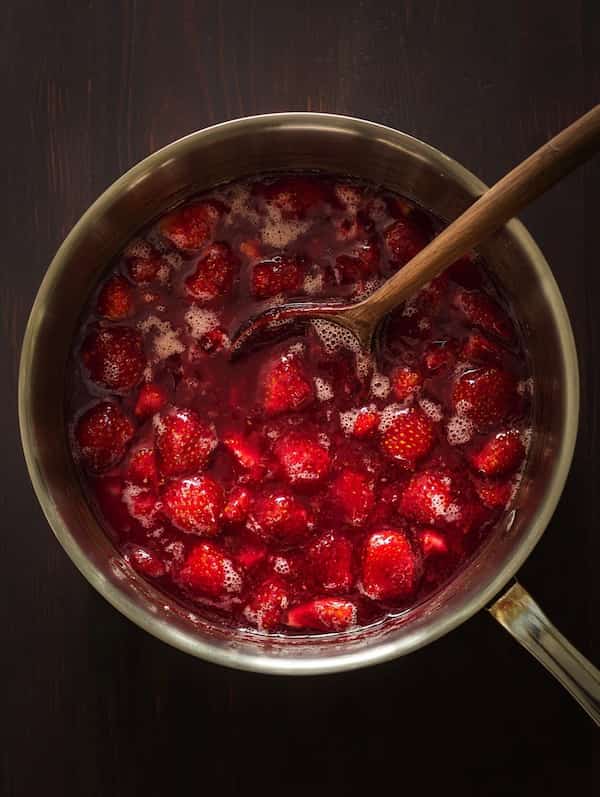
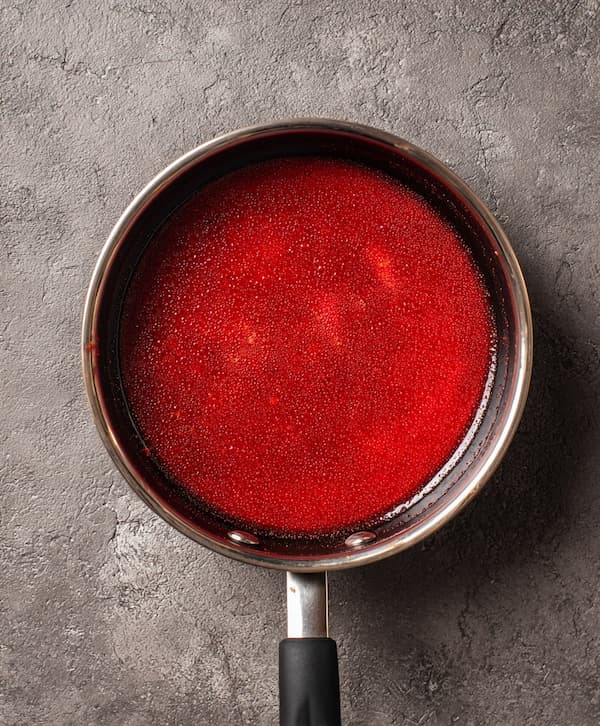
Manage Foam
As the jam boils, a white or pink foam will rise to the top. This is just air being pushed out of the fruit, but it can make your jars look cloudy.
You can skim it off with a spoon, or you can drop in a tiny piece of butter. The fat in the butter breaks the surface tension and makes the foam disappear. It is a neat trick that keeps your jam looking clear and professional.
The Test
Keep the jam at a steady boil for about 15 to 20 minutes. You need to reach the “setting point.” Since we are not using a thermometer, use the plate test. Put a small plate in the freezer before you start.
Drop a spoonful of hot jam onto the cold plate and let it sit for a minute. Push the jam with your finger. If it wrinkles and holds its shape, it is done. If your finger slides right through it, boil it for another three minutes and try again.
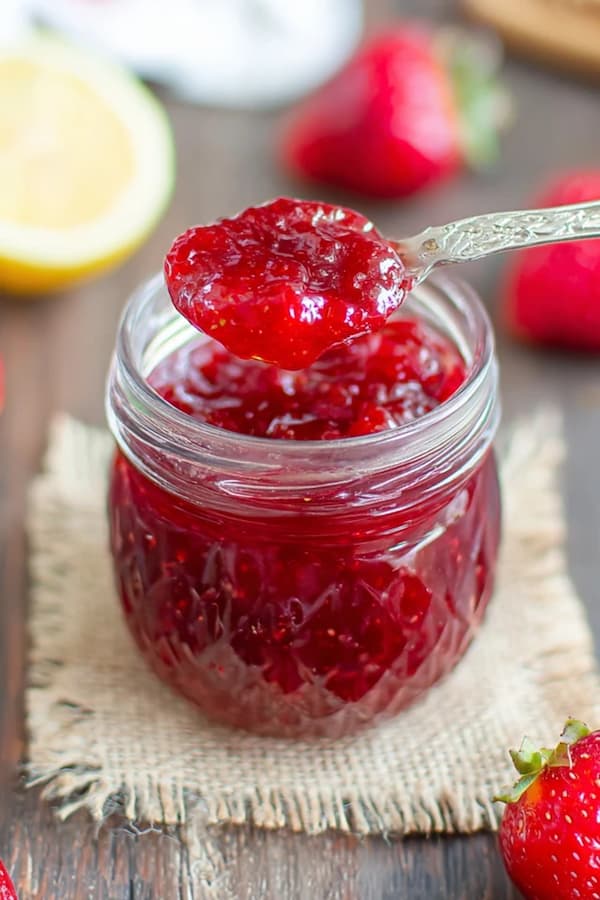
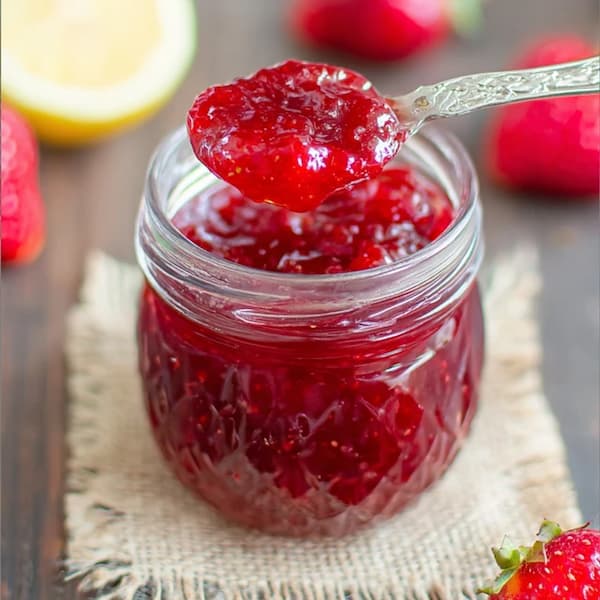
Jar Fill
Turn off the heat and let the jam sit for five minutes. This prevents all the fruit from floating to the top of the jars. Pour the hot jam into clean, sterilized glass jars, leaving about a quarter-inch of space at the top. Wipe the rims clean so the lids can get a good seal.
Let the jars sit on the counter until they are completely cool before moving them to the fridge or a dark pantry.
Better Flavor
To make your jam stand out, focus on the quality of the berries. Huge, watery strawberries from the supermarket often lack flavor. If you can, go to a local farm or a farmer’s market during the peak of strawberry season. Small, dark red berries have the most sugar and will give you a much better result.
Also, do not be tempted to cut the sugar. I know it looks like a lot, but sugar is not just for sweetness here. It acts as the preservative and the structural glue that makes the jam set. If you reduce the sugar too much, the jam will be runny and it will spoil much faster.
If you want a less sweet jam, you can add a bit more lemon juice to balance it out.
Common Pitfalls
The most common mistake is overcooking the jam. If you boil it for too long, the sugar will start to caramelize. This gives the jam a dark, burnt-sugar taste and makes it very stiff, like candy. Always start testing for the set at the 15-minute mark. It is better to have a slightly soft jam than a jar of strawberry bricks.
Another issue is using a pot that is too small. When jam reaches a full boil, it can rise up quite high. If your pot is too small, it will boil over onto your stove, which is a massive, sticky mess to clean up. Use a pot that is at least twice as big as the volume of your fruit and sugar combined.
Why Is My Strawberry Jam Not Thickening Up?
If your jam is still runny after it has cooled, it usually means it did not reach the right temperature or there was not enough acid. You can actually fix this! Pour the jam back into a pot, add another tablespoon of lemon juice, and bring it back to a boil for five more minutes. Perform the plate test again to be sure.
Also, remember that jam continues to thicken for up to 24 hours after it is put into the jars. Do not panic if it looks a little thin while it is still warm; give it a full day to reach its final texture.
How Do I Store My Homemade Jam Without It Going Bad?
If you are not using a traditional water-bath canning method, your jam must be stored in the refrigerator. In the fridge, it will stay fresh and safe to eat for about three to four weeks. If you want it to last longer, you can store it in the freezer for up to six months. Just make sure to use freezer-safe jars and leave enough space at the top so the glass doesn’t crack when the liquid expands.
If you see any signs of mold or if the jam smells “sour” like wine, throw it away immediately.
Why Homemade Strawberry Jam is a Must Try?
There is a deep satisfaction in looking at a row of bright red jars that you filled yourself. It is a slow process that rewards you with the best possible version of a simple food. Homemade strawberry jam is perfect on toast, but it is also incredible over vanilla ice cream or swirled into plain yogurt.
Once you get the hang of this basic three-ingredient method, you can start adding your own touches. Try adding a scraped vanilla bean to the pot, or some finely chopped basil at the very end.
Making jam is a craft, and the more you do it, the better your “feel” for the setting point will become. It is a great skill to have and makes for the best handmade gifts.
Ingredients
Method
- Start by washing your berries in cold water. Remove the green tops and slice the berries into halves or quarters. Put the berries in a heavy-bottomed pot.
- Put a small plate in the freezer before you start. You will need it for later.
- Pour the sugar over the berries and stir them together. Let this sit for about thirty minutes. The sugar will draw the juice out of the strawberries, creating a thick syrup before you even turn on the stove.
- Add the lemon juice and turn the heat to medium. Stir the pot constantly until the sugar is completely melted.
- Once the liquid is clear and bubbling, turn the heat up to medium-high. As the jam boils, a white or pink foam will rise to the top. This is just air being pushed out of the fruit, but it can make your jars look cloudy. You can skim it off with a spoon, or you can drop in a tiny piece of butter. The fat in the butter breaks the surface tension and makes the foam disappear.
- Keep the jam at a steady boil for about 15 to 20 minutes.
- Since we are not using a thermometer, get the plate of the freezer. Drop a spoonful of hot jam onto the cold plate and let it sit for a minute. Push the jam with your finger. If it wrinkles and holds its shape, it is done. If your finger slides right through it, boil it for another three minutes and try again.
- Turn off the heat and let the jam sit for five minutes.
- Pour the hot jam into clean, sterilized glass jars, leaving about a quarter-inch of space at the top.
- Let the jars sit on the counter until they are completely cool before moving them to the fridge or a dark pantry.