Every holiday season, my kitchen fills with the smell of cookies, but thumbprint cookies always feel extra special. They’re simple, elegant, and always the first to disappear when I bring them to a gathering.
I still remember making them with my mom as a kid. She’d let me press my thumb right into the dough, and I thought it was magic watching the cookies bake up with a perfect little well ready for jam. To this day, I carry on that tradition.
These cookies are classic, comforting, and surprisingly easy to make.
Why Thumbprint Cookies Are So Beloved
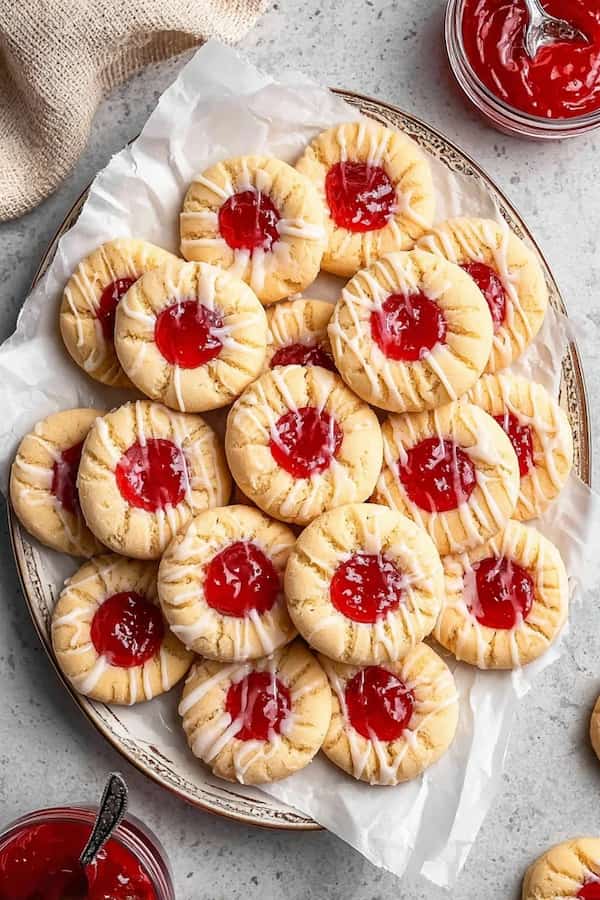
Part of the charm of thumbprint cookies is their balance. The base is a buttery shortbread that melts in your mouth, while the jam adds a burst of sweetness and a pop of color. You can fill them with raspberry, apricot, strawberry, or even lemon curd — each batch can look and taste slightly different, which keeps things exciting.
They also make beautiful gifts. A small box of homemade thumbprints tied with a ribbon feels thoughtful and festive without being complicated.
Ingredients You’ll Need
- 1 cup unsalted butter, softened
- ⅔ cup granulated sugar
- 2 large egg yolks
- 1 teaspoon vanilla extract
- 2 cups all-purpose flour
- ½ teaspoon salt
- ½ cup fruit jam or preserves (raspberry, strawberry, or apricot work best)
Optional: powdered sugar for dusting
Make the Dough
Start by beating the butter and sugar together in a large bowl until light and creamy. Add the egg yolks and vanilla extract, mixing until smooth. Gradually stir in the flour and salt until a soft dough forms.
The dough will feel a little crumbly at first, but once you press it together, it comes together beautifully. If it feels too soft, chill it in the refrigerator for 20–30 minutes to make shaping easier.

Shape the Cookies
Preheat your oven to 350°F (175°C). Roll the dough into 1-inch balls and place them on a baking sheet lined with parchment paper. Now comes the fun part: gently press your thumb into the center of each ball to make a small indentation.

If the dough cracks a little around the edges, don’t worry — just pinch it back together. Those little imperfections are part of what makes homemade cookies look charming.
Add the Jam
Spoon about ½ teaspoon of jam into each indentation. Don’t overfill; the jam will spread slightly as the cookies bake. I like to mix and match flavors in a single batch so there’s something for everyone. Raspberry is my personal favorite — it gives a pretty jewel-like finish and a tart bite that balances the buttery dough.
Bake and Cool
Bake the cookies for 12–14 minutes, or until the edges are lightly golden. The centers should remain pale. Let them cool on the baking sheet for 5 minutes before transferring to a wire rack.

As they cool, the jam will set, and the cookies will firm up to that perfect shortbread texture. If you want an extra festive touch, dust them with powdered sugar once they’ve cooled completely.
Serving Ideas That Go Beyond Tradition
Thumbprint cookies are lovely just as they are, but there are fun ways to serve them, too. Arrange them on a holiday cookie tray with chocolate chip and sugar cookies for variety. Pair them with coffee or tea for an afternoon snack. Or box them up with parchment paper and give them as gifts — they travel well and look beautiful.
At home, I sometimes serve them with ice cream. A couple of thumbprint cookies on the side of a scoop of vanilla feels like an instant dessert upgrade.
Tips for Perfect Thumbprint Cookies
- Chill the dough: If your dough feels sticky, chilling makes it easier to roll and prevents spreading.
- Don’t overfill: A little jam goes a long way — too much will bubble over.
- Use smooth jam: Seedless jam or preserves look neat and glossy in the center.
- Keep them uniform: Rolling the dough into even-sized balls ensures they bake evenly.
- Dust after cooling: If you want that snowy powdered sugar look, wait until the cookies are cool.
Fun Variations to Try
One of the best parts of thumbprint cookies is how versatile they are. Here are a few variations to keep things interesting:
- Nutty edges: Roll the dough balls in finely chopped nuts before pressing the thumbprint.
- Chocolate lovers: Fill with Nutella or melted chocolate instead of jam.
- Citrus twist: Use lemon curd or orange marmalade for a zesty filling.
- Holiday sparkle: Add colored sprinkles around the edges before baking.
These little changes can make each batch feel fresh and new while keeping the heart of the recipe intact.
Why This Recipe Works Every Time
The dough is essentially a simple shortbread, which means it’s buttery, crumbly, and easy to work with. Using only the egg yolks keeps the texture tender, while the jam provides just the right pop of sweetness. It’s a classic combination that never goes out of style.
And because the recipe is straightforward, it’s perfect for both beginner bakers and seasoned pros. Once you’ve made a batch, you’ll realize just how forgiving and fun these cookies are.
Storing and Freezing
Thumbprint cookies store well in an airtight container at room temperature for up to 4 days. If you want to keep them longer, you can refrigerate them for up to a week.
They also freeze beautifully. Arrange cooled cookies in a single layer on a baking sheet, freeze until firm, then transfer to a freezer bag. Thaw at room temperature before serving.
Your New Favorite
Thumbprint cookies are proof that the simplest recipes often bring the most joy. With just a few pantry staples and a spoonful of jam, you can create cookies that are as beautiful as they are delicious.
For me, they’re more than just a treat — they’re a tradition. From pressing my thumb into the dough as a child to baking them now for friends and family, these cookies carry memories with them.
So the next time you want a cookie that’s easy, elegant, and full of flavor, try this classic thumbprint cookie recipe. Chances are, they’ll become part of your family traditions too.
Ingredients
Method
- Start by beating the butter and sugar together in a large bowl until light and creamy.
- Add the egg yolks and vanilla extract, mixing until smooth.
- Gradually stir in the flour and salt until a soft dough forms.
- If it feels too soft, chill it in the refrigerator for 20–30 minutes to make shaping easier.
- Roll the dough into 1-inch balls and place them on a baking sheet lined with parchment paper.
- gently press your thumb into the center of each ball to make a small indentation.
- Spoon about ½ teaspoon of jam into each indentation.
- Bake the cookies for 12–14 minutes, or until the edges are lightly golden.
- Let them cool on the baking sheet for 5 minutes before transferring to a wire rack.
Notes
- Chill the dough: If your dough feels sticky, chilling makes it easier to roll and prevents spreading.
- Don’t overfill: A little jam goes a long way — too much will bubble over.
- Use smooth jam: Seedless jam or preserves look neat and glossy in the center.
- Keep them uniform: Rolling the dough into even-sized balls ensures they bake evenly.
- Dust after cooling: If you want that snowy powdered sugar look, wait until the cookies are cool.