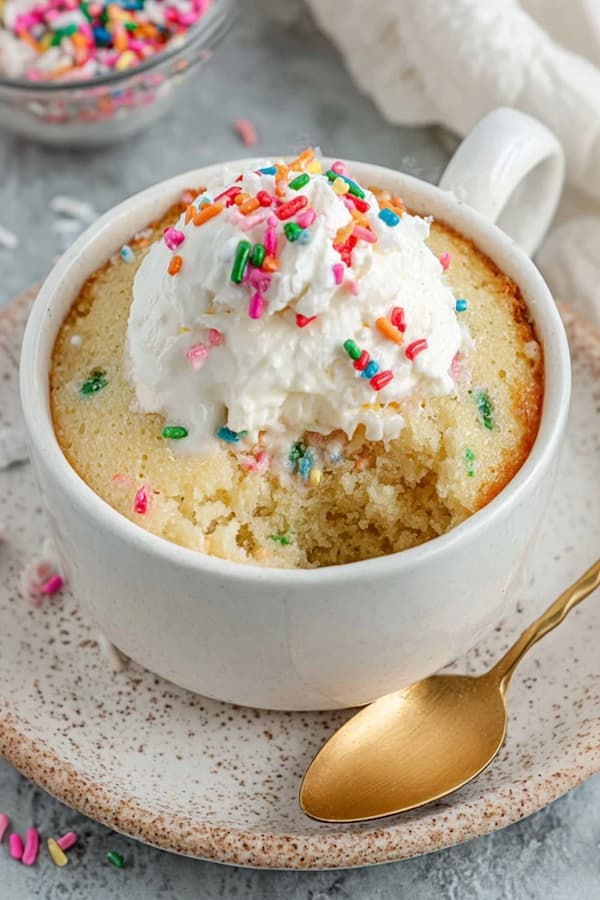
A microwave vanilla mug cake is the fastest way to satisfy a dessert craving without the mess of a full baking session. This single-serving treat creates a warm, spongy cake that rivals any traditional oven-baked version in just a few minutes.
It is a perfect high-protein vegetarian snack when you want something sweet and homemade on a whim.
Ingredients
Yields: 1 serving
- 4 tablespoons all-purpose flour
- 2 tablespoons granulated sugar
- 1/2 teaspoon baking powder
- 1/8 teaspoon sea salt
- 3 tablespoons whole milk
- 1 tablespoon melted butter or vegetable oil
- 1/2 teaspoon vanilla extract
- 1 tablespoon rainbow sprinkles (optional)
- 1 tablespoon Greek yogurt or whipped cream for topping
Why You Must Try This Microwave Vanilla Mug Cake Recipe
You should try this recipe because it solves the problem of wanting a fresh, warm dessert without having to commit to an entire dozen of cupcakes. Most mug cakes turn out rubbery or dry, but this specific ratio of milk to flour ensures the crumb stays moist and tender even after it cools down.
It is an excellent high-protein vegetarian treat because you can easily swap the milk for a protein-rich alternative or add a dollop of Greek yogurt on top for extra nutrition.
Since everything happens in one mug, the cleanup takes less than thirty seconds, making it the ideal late-night reward or a quick afternoon pick-me-up.
Select Your Mug
The first step to a successful mug cake is choosing the right vessel. You want a ceramic mug that can hold at least twelve ounces of liquid to ensure the batter doesn’t overflow as it rises.
A mug with straight sides is better than one with a tapered bottom because it allows the heat to distribute more evenly through the flour. If your mug is too small, the cake will spill over the edges and create a sticky mess on your microwave glass.
Check the bottom of the mug to make sure it is labeled as microwave-safe so it doesn’t crack under the sudden heat.
Whisk the Dry
Add your flour, sugar, baking powder, and salt directly into the mug. Use a small whisk or a fork to stir these dry ingredients together until they are well combined. It is important to break up any large clumps of flour at this stage, as they will turn into dry, white pockets in your finished cake.
The baking powder is the most important part of this step; it provides the lift that turns a flat batter into a fluffy sponge. Make sure your baking powder is fresh, or the cake will turn out dense and gummy.
Pour the Wet
Add the milk, melted butter, and vanilla extract into the mug with the dry ingredients. If you are using butter, make sure it is melted but not piping hot, as it could start to activate the baking powder too soon.
The vanilla extract is the star of this recipe, providing that nostalgic, birthday-cake aroma that makes this simple dessert feel special. Using whole milk gives the cake a much richer flavor and a softer texture than using water or skim milk. This liquid layer is what transforms the powder into a smooth, glossy batter.
Stir the Batter
Use your fork to stir everything together until the batter is completely smooth. Be sure to reach the fork into the very bottom corners of the mug, as dry flour often hides there and refuses to mix in. Stop stirring as soon as the batter looks uniform; over-mixing can develop too much gluten, which results in a tough, rubbery cake.
If you want to add rainbow sprinkles or chocolate chips, fold them in gently at the very end. The batter should look thick enough to hold its shape but thin enough to level out on its own.
Heat the Core
Place your mug in the center of the microwave. Cook the cake on high power for about seventy to ninety seconds. Every microwave is different, so it is a good idea to start with sixty seconds and check the progress.
The cake will rise significantly during the cooking process, often peeking over the top of the mug before settling back down. You will know it is done when the top looks dry to the touch and the edges have pulled away slightly from the sides of the mug. If it still looks wet in the center, give it another ten seconds.
Let it Set
Resist the urge to eat the cake the second the microwave beeps. Letting the mug cake sit for two minutes is a crucial part of the cooking process. During this time, the internal steam finishes cooking the very center of the cake and the structure sets. If you dig in too early, the cake might feel a bit undercooked or mushy.
This cooling period also allows the flavors to settle, making the vanilla taste more prominent. Use this time to get your toppings ready, like a spoonful of cool Greek yogurt or a drizzle of honey.
Top the Treat
Once the cake has rested, add your favorite toppings. A dollop of Greek yogurt adds a nice tangy contrast to the sweetness of the vanilla and boosts the protein content of your snack. You could also add a few more sprinkles or a fresh berry if you have one on hand.
Eating the cake while it is still warm is the best way to experience its soft, airy texture. Since it is a single-serving recipe, you don’t have to worry about leftovers or storage.
How To Make This Microwave Vanilla Mug Cake Better
- Use Brown Sugar: Swap half of the white sugar for brown sugar to get a deeper, caramel-like flavor and a moister crumb.
- Add a Center: Press a single square of white chocolate or a teaspoon of jam into the center of the batter before cooking for a molten core.
- Almond Extract: Add a single drop of almond extract along with the vanilla to give the cake a professional bakery flavor.
- Salt Balance: Use a tiny pinch of flaky sea salt on top after cooking to balance the sweetness of the sugar and sprinkles.
Why did my mug cake turn out rubbery?
The most common reason for a rubbery mug cake is over-mixing the batter or over-cooking it in the microwave. When you mix flour with liquid, you create gluten; too much mixing makes that gluten tough.
Additionally, because microwave ovens cook by vibrating water molecules, leaving the cake in for even ten seconds too long can turn it from a soft sponge into a piece of rubber. Always start with the minimum suggested time and check for doneness frequently.
Can I make this recipe gluten-free or dairy-free?
Yes, this recipe is very easy to adapt for different diets. You can use a 1-to-1 gluten-free flour blend in place of the all-purpose flour, though the texture might be slightly grainier. For a dairy-free version, swap the cow’s milk for almond or oat milk and use vegetable oil or a dairy-free butter substitute.
These changes won’t significantly affect the cooking time, so you can still enjoy a quick high-protein vegetarian dessert in under two minutes.
Microwave Vanilla Mug Cake Recipe Card
- Prep Time: 2 minutes
- Cook Time: 90 seconds
- Total Time: 3 minutes 30 seconds
- Yields: 1 serving
Whisk the Dry
In a 12-ounce microwave-safe ceramic mug, combine the flour, sugar, baking powder, and sea salt. Use a fork to whisk these together until no clumps remain. This ensures the leavening agent is evenly distributed, preventing your high-protein vegetarian snack from having a lumpy or uneven texture.
Pour the Wet
Add the milk, melted butter (or oil), and vanilla extract directly into the mug. The vanilla is the key to that professional, bakery-style aroma. If you prefer a richer flavor, using whole milk provides the necessary fats to keep the mug cake moist during the rapid microwave cooking process.
Stir the Batter
Mix with a fork until the batter is smooth, making sure to scrape the bottom corners of the mug where dry flour often hides. If you are adding rainbow sprinkles, fold them in gently now. Avoid over-mixing at this stage, as too much agitation can make the cake rubbery instead of fluffy.
Heat the Core
Place the mug in the center of the microwave and cook on high for 70 to 90 seconds. The cake will rise significantly before settling. It is done when the top is dry to the touch and the edges pull away slightly from the mug. Every microwave varies, so start with the lower time first.
Let it Set
Allow the mug cake to rest for a full 2 minutes before eating. This is a top-notch cooling step that allows the internal steam to finish the cooking process and lets the delicate vanilla sponge set firmly. This patience ensures a perfect, tender crumb rather than a gummy center.
Top the Treat
Finish your cake with a dollop of Greek yogurt, whipped cream, or extra sprinkles. The addition of Greek yogurt is a smart high-protein vegetarian choice that balances the sweetness and adds a creamy, professional finish to your single-serving dessert.
Ingredients
Method
- In a 12-ounce microwave-safe ceramic mug, combine the flour, sugar, baking powder, and sea salt. Use a fork to whisk these together until no clumps remain. This ensures the leavening agent is evenly distributed, preventing your high-protein vegetarian snack from having a lumpy or uneven texture.
- Add the milk, melted butter (or oil), and vanilla extract directly into the mug. The vanilla is the key to that professional, bakery-style aroma. If you prefer a richer flavor, using whole milk provides the necessary fats to keep the mug cake moist during the rapid microwave cooking process.
- Mix with a fork until the batter is smooth, making sure to scrape the bottom corners of the mug where dry flour often hides. If you are adding rainbow sprinkles, fold them in gently now. Avoid over-mixing at this stage, as too much agitation can make the cake rubbery instead of fluffy.
- Place the mug in the center of the microwave and cook on high for 70 to 90 seconds. The cake will rise significantly before settling. It is done when the top is dry to the touch and the edges pull away slightly from the mug. Every microwave varies, so start with the lower time first.
- Allow the mug cake to rest for a full 2 minutes before eating. This is a top-notch cooling step that allows the internal steam to finish the cooking process and lets the delicate vanilla sponge set firmly. This patience ensures a perfect, tender crumb rather than a gummy center.
- Finish your cake with a dollop of Greek yogurt, whipped cream, or extra sprinkles. The addition of Greek yogurt is a smart high-protein vegetarian choice that balances the sweetness and adds a creamy, professional finish to your single-serving dessert.
Notes
- Use Brown Sugar: Swap half of the white sugar for brown sugar to get a deeper, caramel-like flavor and a moister crumb.
- Add a Center: Press a single square of white chocolate or a teaspoon of jam into the center of the batter before cooking for a molten core.
- Almond Extract: Add a single drop of almond extract along with the vanilla to give the cake a professional bakery flavor.
- Salt Balance: Use a tiny pinch of flaky sea salt on top after cooking to balance the sweetness of the sugar and sprinkles.