The first time I tried to melt chocolate for dipping strawberries, it looked perfect at first. Then it cooled and turned dull, streaky, and soft instead of shiny and crisp.
I didn’t know it then, but that was my first lesson in tempering.
Tempering chocolate sounds complicated, but it’s really about patience and understanding what heat does to cocoa butter. Once you learn the rhythm, it becomes one of those quiet kitchen tasks you can do with confidence.
Why Tempering Matters
When chocolate is melted and cooled without control, the cocoa butter crystals form unevenly. That’s what causes gray streaks or a soft, chalky surface. Tempering keeps those crystals in line, so the chocolate looks smooth and holds its shape at room temperature.
Tempered chocolate is ideal for coating truffles, dipping fruit, or molding bars. It keeps candies from melting too quickly in your hands and gives desserts that professional finish you always notice in bakeries.
What You’ll Need
Tempering doesn’t require fancy tools. You only need:
- good-quality chocolate (not chocolate chips, which have stabilizers)
- a heatproof bowl
- a pot for boiling water
- a rubber spatula
- a kitchen thermometer (helpful, but you can do it without one)
Use real chocolate that contains cocoa butter, not baking melts or candy coating. Those don’t need tempering and won’t give you the same taste or shine.
The Basic Method
There are a few ways to temper chocolate, but the seeding method is the easiest for home cooks. It’s simple and reliable.
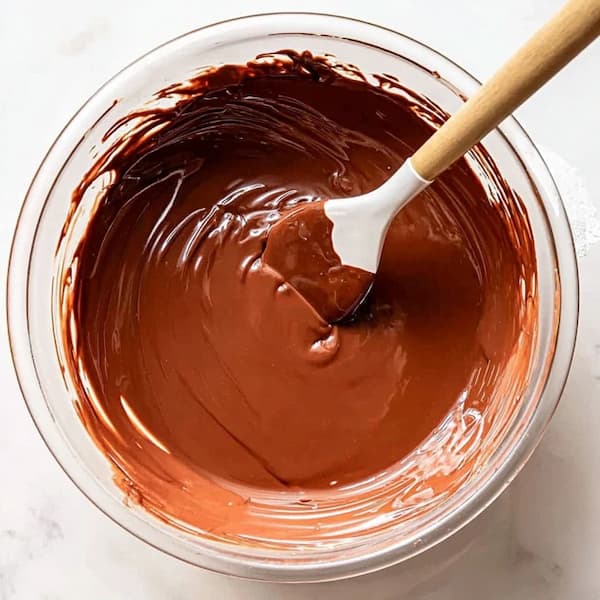
Chop and Melt
Chop your chocolate into small, even pieces. Set aside about one-third of it and put the rest into a heatproof bowl.
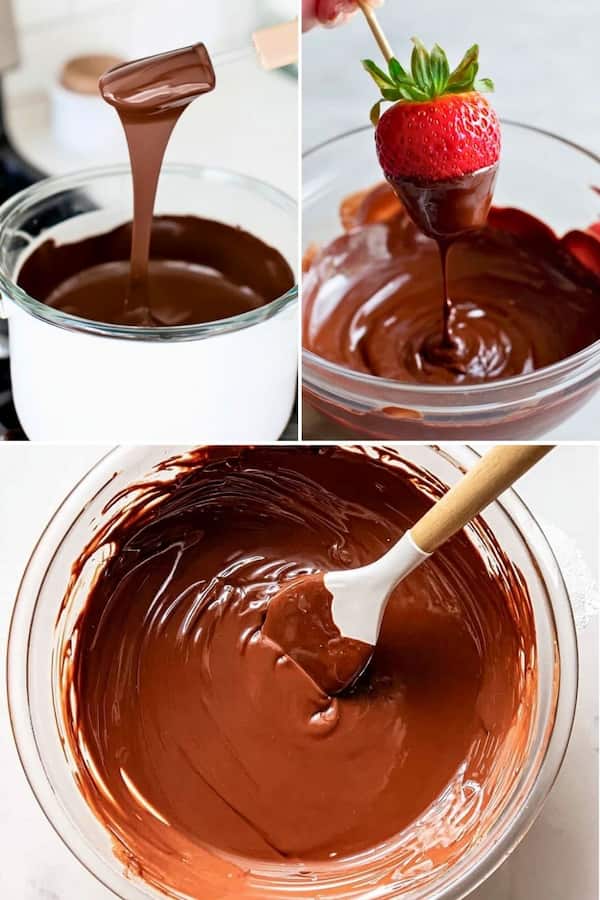
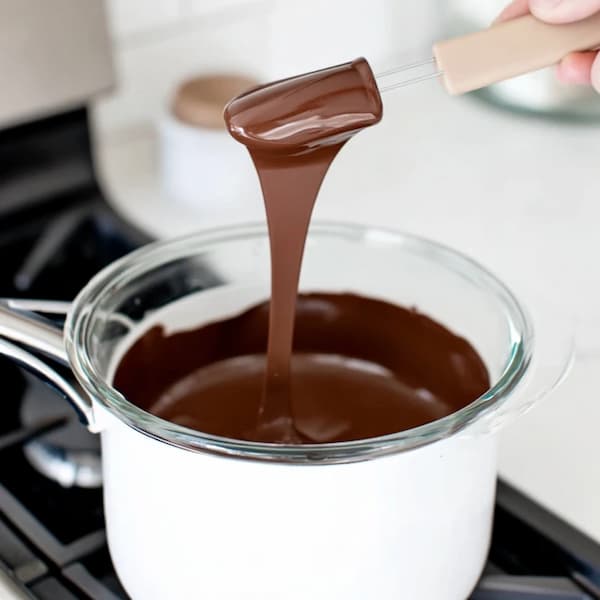
Fill a pot with an inch of water and bring it to a simmer. Place the bowl on top so it rests above the steam, not in the water. Stir gently as it melts.
If you’re using a thermometer, here’s the target range:
- Dark chocolate: 45–50°C (113–122°F)
- Milk or white chocolate: 40–45°C (104–113°F)
Once melted, remove the bowl from the pot.
Cool with Seed Chocolate
Add the reserved third of chopped chocolate to the melted chocolate. Stir slowly so it melts and cools the mixture. This helps form stable cocoa butter crystals.
Keep stirring until the chocolate feels cooler to the touch — around 31°C (88°F) for dark chocolate or 29°C (84°F) for milk and white. If you don’t have a thermometer, touch a drop to your lower lip; it should feel slightly cool, not warm.
When it reaches that point, your chocolate is tempered.
Test and Use
To test, dip a spoon or a small piece of parchment paper into the chocolate. Let it sit for a few minutes. If it sets evenly with a glossy shine, you did it right.
If it stays streaky or sticky, it needs a bit more cooling. Stir gently for another minute and test again.
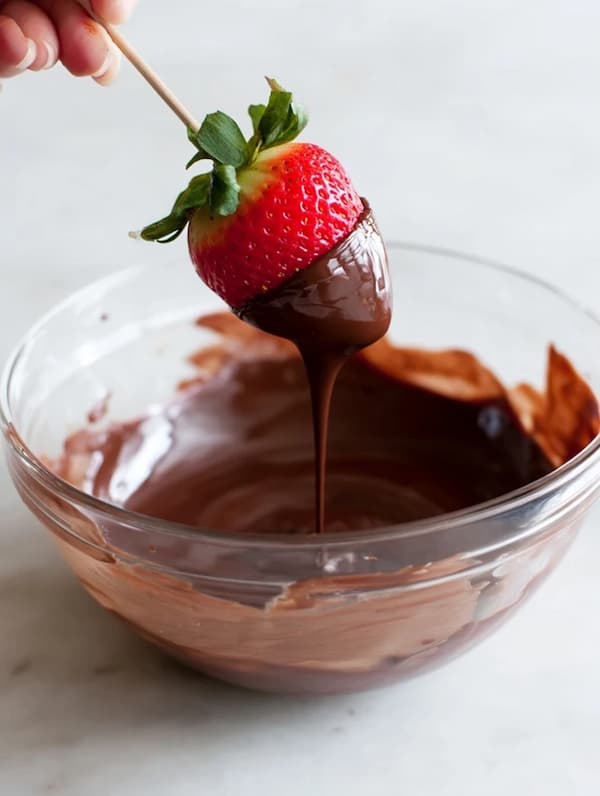
Once tempered, you can dip strawberries, coat truffles, or pour it into molds. Work quickly — as the chocolate cools, it thickens. If it becomes too thick, warm it slightly over hot water for a few seconds and stir again.
Common Mistakes to Avoid
When I first started tempering, I made every mistake possible. Here are the ones that matter most:
- Water is chocolate’s biggest enemy. Even a drop can make it seize and turn grainy. Always use a dry bowl and utensils.
- Don’t overheat the chocolate. Once you pass 55°C (130°F), the cocoa butter can burn and lose its smooth texture.
- Keep stirring. Stirring is what distributes the right type of crystals evenly through the chocolate.
- Don’t rush the cooling step. This is where tempering actually happens.
- If the chocolate thickens too soon, gently reheat it for just a few seconds — not more.
These small habits make tempering feel predictable instead of stressful.
How to Fix Chocolate That Lost Its Temper
If your chocolate turns streaky or dull, you can fix it by starting over. Just melt it again to the original melt temperature and repeat the seeding process. It takes a few extra minutes, but it works every time.
You can also use out-of-temper chocolate for baking. It still tastes fine in brownies, cakes, or cookies. I never waste it — I just save it for the next batch of ganache or cocoa drinks.
How to Store Tempered Chocolate
Tempered chocolate sets best at cool room temperature, away from moisture and heat. Once it’s firm, store it in an airtight container.
If your kitchen is warm, refrigerate it for a few minutes to help it harden, then move it to a dry spot. Don’t leave it in the fridge too long or it might pick up moisture and lose its shine.
Properly tempered chocolate keeps its look and crispness for weeks. I often make a batch ahead of time and use it whenever I need quick dessert decorations or chocolate shells.
Lessons from My Early Tries
Every time I temper chocolate, I remember how strange it felt the first few times. It seemed like guessing between too hot and too cool. Over time, I learned what to watch for:
- Keep everything completely dry
- Stir constantly to build structure
- Don’t rely only on the thermometer — pay attention to texture and shine
- Start small until you get a feel for it
- Never skip the test dip before using
Once you’ve done it a few times, you’ll recognize the look of perfectly tempered chocolate just by sight.
Can I temper chocolate in the microwave?
Yes. Use short bursts of 10 to 15 seconds, stirring each time. Stop when most of it is melted, then add a little chopped chocolate to cool it down. It’s easy to overheat in the microwave, so go slow.
What’s the best chocolate for tempering?
Use bars or blocks labeled “couverture” or “baking chocolate.” They contain real cocoa butter, which allows proper tempering. Avoid candy melts or chocolate chips.
Why did my chocolate turn white after cooling?
That white coating is called bloom. It happens when cocoa butter rises to the surface because the chocolate wasn’t tempered or stored correctly. It’s harmless but affects appearance.
Can I reuse tempered chocolate?
Yes. Once it’s tempered, you can remelt it carefully to the same working temperature. As long as you don’t overheat it, the structure remains stable.
Tempering chocolate teaches you patience. It’s one of those quiet kitchen skills that feels rewarding every time you do it. When the chocolate sets smooth and glossy, you’ll feel that little spark of pride — the same feeling that keeps people baking, melting, and stirring long after the recipe ends.
Ingredients
Equipment
Method
- Chop your chocolate into small, even pieces. Set aside about one-third of it and put the rest into a heatproof bowl.
- Fill a pot with an inch of water and bring it to a simmer.
- Place the bowl on top so it rests above the steam, not in the water. Stir gently as it melts.
- Once melted, remove the bowl from the pot.
- Add the reserved third of chopped chocolate to the melted chocolate.
- Stir slowly so it melts and cools the mixture. This helps form stable cocoa butter crystals.
- Keep stirring until the chocolate feels cooler to the touch — around 31°C (88°F) for dark chocolate or 29°C (84°F) for milk and white.
- If you don’t have a thermometer, touch a drop to your lower lip; it should feel slightly cool, not warm.
- When it reaches that point, your chocolate is tempered.
- To test, dip a spoon or a small piece of parchment paper into the chocolate. Let it sit for a few minutes. If it sets evenly with a glossy shine, you did it right.
Notes
- Water is chocolate’s biggest enemy. Even a drop can make it seize and turn grainy. Always use a dry bowl and utensils.
- Don’t overheat the chocolate. Once you pass 55°C (130°F), the cocoa butter can burn and lose its smooth texture.
- Keep stirring. Stirring is what distributes the right type of crystals evenly through the chocolate.
- Don’t rush the cooling step. This is where tempering actually happens.
- If the chocolate thickens too soon, gently reheat it for just a few seconds — not more.